Field Season Planning: SeaSketch Survey Tutorial
This section contains information on using SeaSketch to provide input into Okeanos Explorer planning efforts, using 2018 as an example.
Download a pdf of the tutorial (1.0 MB).
Getting Started
To get started, click the survey link .
Home Screen Familiarization
Clicking the survey link will take you to the survey home screen, a sample of which is pictured below.

On the survey home screen there is an interactive chart on the left and survey tabs on the right.
Chart on the Left
- This chart highlights the tentative operating areas (tan) for 2018 operations in the Caribbean.
- The chart also designates various protected areas, sanctuaries, and U.S. Marine National Monuments areas (these can be toggled on and off under Data Layers, default setting is off).
- There is also a compilation of publicly available, high-resolution bathymetry that will be displayed on your screen when you open the survey. If you find this layer to be too busy, you can turn it off in the Data Layers tab (instructions below)
- Use this icon, found on the top left of your screen, to zoom in/out:

Also, there are some useful features if you click on the wrench or settings button, pictured here:

- If you are not seeing a scale bar displayed on your map, you can click on "show scale bar" under the wrench dropdown menu to display this tool.
Measuring Distances
If you would like to measure distances, whether to see how far something is or how big an area is, or to determine the length of a submitted dive track, click on "measurement tools" under the wrench dropdown menu to display this tool.

![]() The first icon will allow you to draw a polygon and measure an area.
The first icon will allow you to draw a polygon and measure an area.
![]() The second icon will allow you to measure a linear distance. When submitting a dive plan, you made need to zoom in very close to a feature to get an accurate length estimate. You may need to change your units to meters in the drop down menu.
The second icon will allow you to measure a linear distance. When submitting a dive plan, you made need to zoom in very close to a feature to get an accurate length estimate. You may need to change your units to meters in the drop down menu.
![]() The third icon will allow you to get the exact location of a specific point by placing the green marker on the point of interest. Longitude and latitude of the point will appear in the measurement box:
The third icon will allow you to get the exact location of a specific point by placing the green marker on the point of interest. Longitude and latitude of the point will appear in the measurement box:

Tabs on the Right Side of the Home Screen
Data Layers Tab

Under "2018 Okeanos Explorer expedition to the Caribbean,"" you can click on / off various features that are useful tools while taking the survey (pictured above).
Take the Survey
Now that you are familiar with the home screen, you can take the survey.
Under the “Participate” tab, click the green “Take the Survey” button on the survey home screen.

Contact Information
Take a few moments to fill out the “Contact Information” portion of the survey form (Full Name, Email Address, Affiliation, Expertise/Interest). Sample pictured below.

Adding a Mapping Request
Scroll down to "Mapping Operations."
- Under Mapping Operations click "Add Feature."

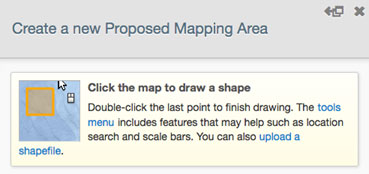
NOTE: Once you click “Add a Feature” you will be prompted to select a mapping area of interest. Click on the chart to draw a shape. You can also click “ESC”, click the "X" or click “cancel” on the bottom of the screen to undue any unwanted features. - After selecting your mapping feature, fill out the form that accompanies the "Add Feature" tab. Adding Location Name, Request Name, etc.

- Once the form is filled out, click the "Save and Continue Survey" button. You can add as many mapping areas of interest as you like.
Adding ROV Targets
Scroll Down to ROV Targets
- Under ROV Targets, click the "Add a Feature" button.

- Here is a sample with dive site priority numbers:
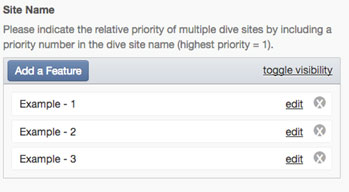
NOTE: Once you click “Add a Feature” you will be prompted to propose a ROV Dive Site. Click on the chart to draw a point. You can also click “ESC”, click the “X” or click “cancel” on the bottom of the screen to undue any unwanted features.

- After selecting your feature, fill out the form that accompanies the "Add Feature" tab. Adding Location Name, Depth Range, etc.

- Once the form is filled out, click the "Save and Continue Survey" button. You can add as many Proposed ROV Dive Sites as you like.
Submit Completed Survey
Once you are finished adding features, you are ready to complete your survey by clicking the "Submit Response" button.
Thank you for your participation!